With the upcoming release of Windows Server 2016, Nano Server and all things related to Microsoft Azure learning PowerShell Remoting and start relying less and less on the use of Remote Desktops (RDP). A great session to watch on this topic is the “The DevOpsification of Windows Servers” by Jeffrey Snover. My favorite new acronym Jeffrey introduces is SAD “Server And Desktops” and the idea that it is sad people still rely on using remote desktop sessions to perform management tasks on a remote Windows Server.
I embraced PowerShell remoting a long while back and the ability to manage multiple servers is much easier than starting up several different remote desktop sessions. The use of PowerShell remoting is not limited to just Windows management but can also be used for different tools like the Pure Storage PowerShell SDK and Toolkit. Although you can run the SDK and Toolkit on a client machine, such as Windows 7, 8.x or 10, it can also be used through remoting. This becomes important in those cases where some corporate restrictions may not support installing tools on local clients.
Below is a quick primer to get started with PowerShell remoting.
Part 1 – Setup
Step 1: Windows Remote Management Service
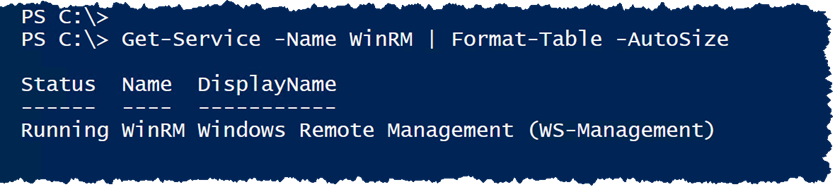
Establish a remote desktop connection to the Windows Server 2012/R2 instance and check to make sure that the Windows Remote Management (WinRM) service is running. This service is running by default.
Step 2: Enable PowerShell Remoting
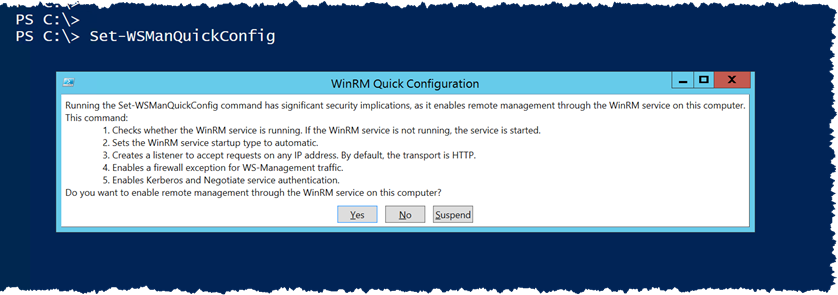
Next is to ensure PowerShell remoting is enabled on the Windows Server. It is enabled by default but a good practice to check. The quickest way to perform this action is to use Enable-PSRemoting but if you are interested in understanding what Enable-PSRemoting is doing run Set-WSManQuickConfig. You can see below the different tasks the cmdlet performs.
Step 3: Set Trusted Hosts on the Client
From the client workstation added an entry for Trusted Hosts. This entry can be set for specific ComputerName(s) or in my example “*” to trust all hosts. The latter is not recommended in production environments.

Part 2 – Using PowerShell Remoting
Windows PowerShell remoting is now setup. In the next few steps we will create a few connections to different Windows Servers, both physical and virtual.
Step 1: Create New PowerShell Sessions
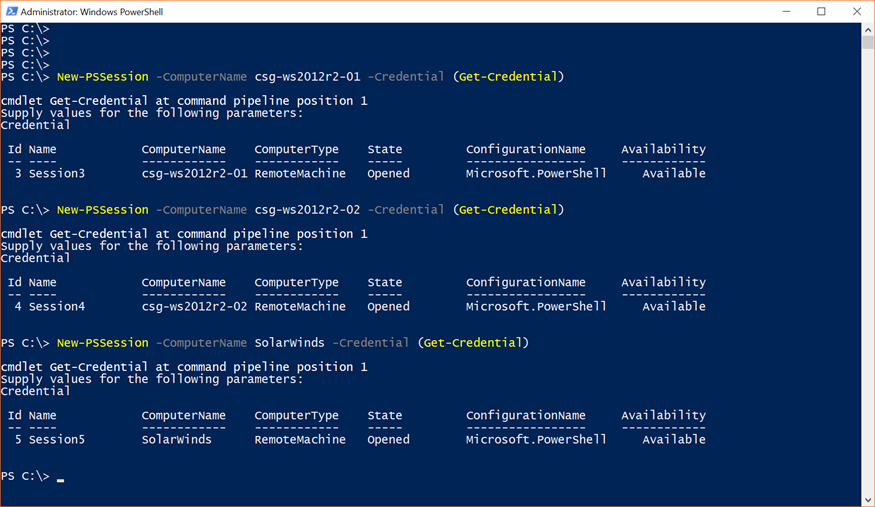
The physical and virtual Windows Server 2012 R2 instances I connect to are in a remote lab. I use the hosts file on my local Windows 10 client to map IP to Instance Name. In the below example Id 3 & 4 are physical hosts and Id 5 is a virtual host running on ESXi 6.0.
Step 2: List and Enter a PowerShell Session
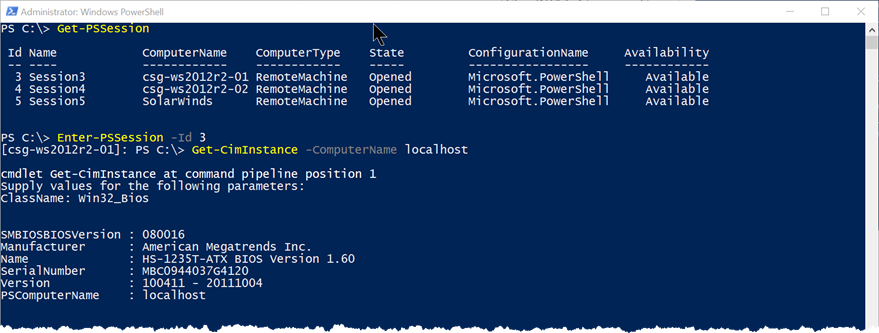
With three different PowerShell sessions created we can log into Session3 (Id 3) and run a Get-CimInstance -ClassName Win32_BIOS to retrieve some basic BIOS information from the physical host.
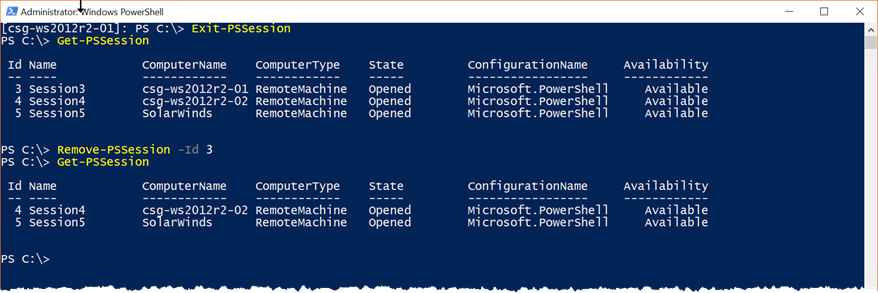
Step 3: Exit and Remove a PowerShell Session
Whenever you are done working within a specific PowerShell session you exit with Exit-PSSession and you can also remove that specific session with Remove-Session.
That is a quick tour of how to use PowerShell Remoting and I highly encourage you to begin using this feature and the different Remote Management Tools provided by Microsoft to start making the transition from using a GUI and Remote Desktop Sessions. Making the transition will ready you for working with Server Core and Nano Server where this is no GUI.
Cheers,
Barkz