@8arkz — June 20/17 — This was the start of all things Windows PowerShell at Pure Storage. Pretty cool to look back at some posts and see how it all got started.
—
In my last post I discussed how take snapshots, connect hosts and then work with the connected Windows hosts to bring disks online. In this post I show how to handle retention management and scheduling using Task Scheduler. The script below is dynamic and assumes running as a scheduled task for taking daily snapshots and then based on specified period of time previous snapshots will be destroyed. For example in the script below the variable $retentionschedule = 7 defines that snapshots 7 days old will be deleted.
<#
.SYNOPSIS
    Snapshot automation, host and Windows host disk management.
.DESCRIPTION
    This Windows PowerShell script provides automation of taking snapshots and deleting
    snapshots based on a simple # of days retention schedule. This script
    is intended to be used against a single Pure Storage array.
.NOTES
    This script requires "SSH-Sessions" Module to be installed. Download the module from
    http://www.powershelladmin.com/w/images/a/a5/SSH-SessionsPSv3.zip. Once downloaded copy
    the SSH-Sessions folder from SSH-SessionsPSv3.zip to the following location:
    C:\Windows\System32\WindowsPowerShell\v1.0\Modules\. Full source code for the SshNet library
    can be found at https://sshnet.codeplex.com/.

    This script uses the pureuser/pureuser account/password to perform all actions. If a more
    secured implementation is required it is possible to use host certificates.
.AUTHOR
    Author:     Rob 'barkz' Barker
    Company:    Pure Storage, Inc.
    Date:       January 2014
    This code can be copied and used as long as proper attribution is given and
    these notes are kept intact.
#>

#
# Variable declarations.
#
$retentionschedule = 7 # Change this variable based on retention requirements.
$purearray = "XXX.XXX.XXX.XXX" # IP address to Pure FlashArray.
$sshuser = "<USERNAME>" # Pure user account.
$sshpass = "<USERPASSWORD>" # Pure user account password.
$current = "{0:yyyy-MMM-dd-HH-mm}" -f (Get-Date)
$today = Get-Date -uFormat  %m%d%y
$retentiondate = (Get-Date).AddDays(-$retentionschedule).ToString("MMddyy")

#
# Import the SSH-Sessions module to connect to the Pure Storage FlashArray and execute CLI commands.
#
Import-Module -Name SSH-Sessions

#
# Connect to the Pure Storage FlashArray
# NOTE: Username and password are in cleartext by default. For a more secure approach a host certificate can be used.
#
New-SshSession -ComputerName $purearray -Username $sshuser -Password $sshpass

#
# Get a list of volumes then snap all volumes.
#
Invoke-SshCommand -ComputerName $purearray -Command "purevol list --csv" | Out-File PureVolList.csv
$PureVols = Import-Csv PureVolList.csv
ForEach ($PureVol in $PureVols) {
    $VolumeToSnap = $PureVol.Name
    #
    # The snapshot suffix is a general date of the snap. This can be more granular if required. This
    # serves as the signature for when to retention delete.
    #
    Invoke-SshCommand -ComputerName $purearray -Command "purevol snap $VolumeToSnap --suffix $today" -Quiet

    $destroy = $PureVol.Name + "." + $retentiondate
    Invoke-SshCommand -Computername $purearray -Command "purevol destroy $destroy" -Quiet
}

#
# Close any open SSH Sessions to the Pure Storage FlashArray.
#
Remove-SshSession -RemoveAll
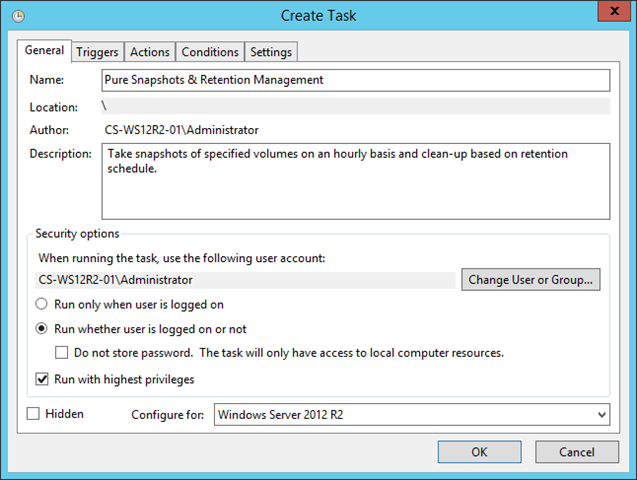
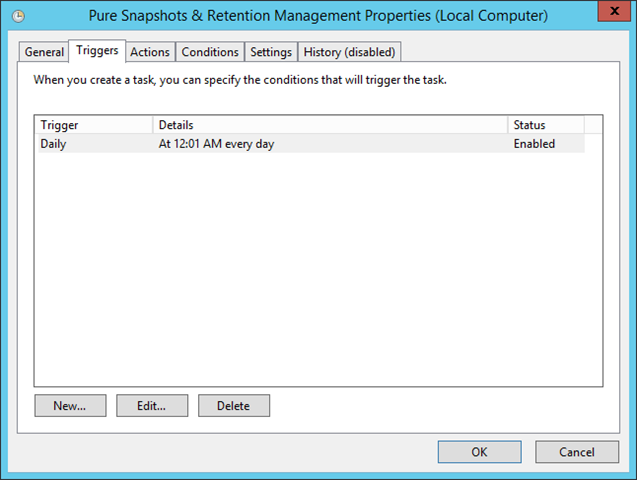
In my example I created a new Pure Storage folder under the Task Scheduler Library to store my Pure Array tasks. Once the Pure Snapshots & Retention Management task has been setup in Task Scheduler you will see the following:

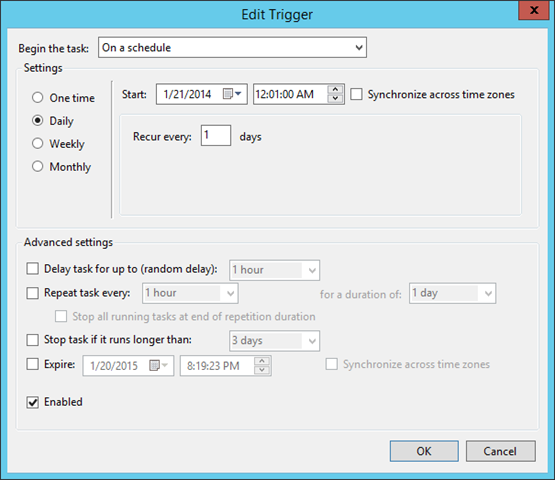
The following screenshots illustrate just how I set this up in Task Scheduler on Windows Server 2012 R2.
Creating a New Trigger; since this script was created as a daily snapshot I have set the Trigger to be Daily, Recur every 1 days at 12:01AM.
This is the most critical part of the task to set the Action which defines the PowerShell script to be executed.
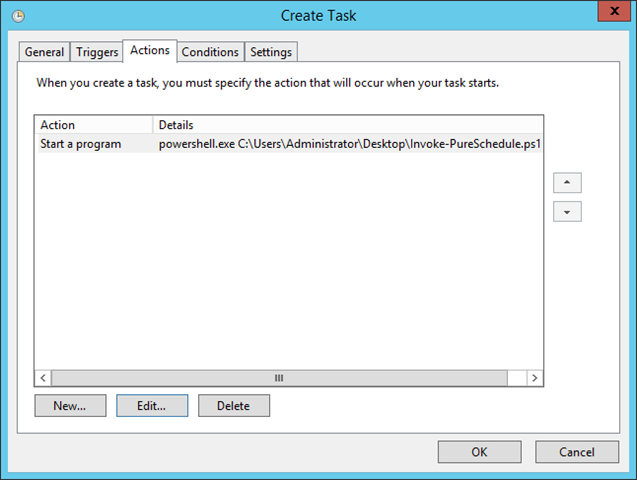
The Add arguments attribute defines the location of the Invoke-PureSchedule.ps1 file. This file can be located anywhere on the system. In my example the .ps1 file is located at C:\Users\Administrator\Desktop\Invoke-PureSchedule.ps1. The full command that will be executed will look like: powershell.exe –File “C:\C:\Users\Administrator\Desktop\Invoke-PureSchedule.ps1”

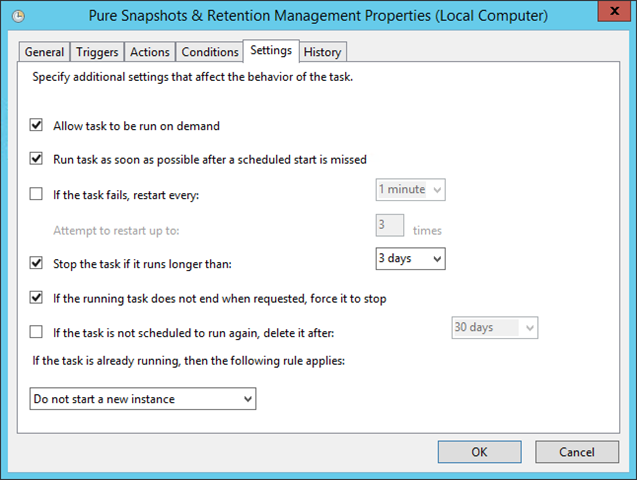
The Conditions tab has several settings for Network, Power and Idle which control whether or not the task is run. I did not change any of the default conditions for my work hence why I did not include a screenshot of that tab. Finally is the Settings tab which you can define the behavior of the task and the only attribute I enabled was Allow task to be run on demand, which allows you to right-click the task in the management view and Run.
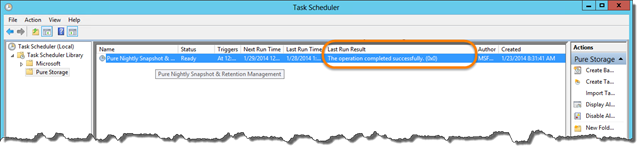
Even though this has been setup to run as a scheduled task you can test out the new task by right-clicking the task then and choosing Run. If all things goes as planned the Last Run Result should read The operation completed successfully. (0x0), as below.
This certainly isn’t the only approach that can be taken to handle snapshot retention management. If you have other ideas let know or any questions, otherwise happy scheduling!